Using Eclipse for Application Development
Configuring Eclipse
The first step is to configure Eclipse to use the Tomcat plugin. Do the
following:
- In the main menu, choose Window ->
Preferences .
- In the opened window, expand the list item Tomcat (in the left frame).
- Click on Tomcat.
-
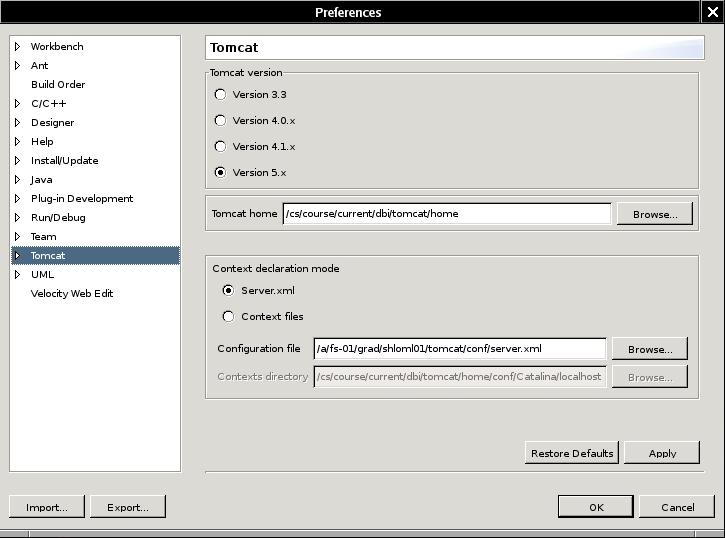
In the right frame do the following:
- Choose the Version 5.x radio
button;
- In the Tomcat home text field
write: /cs/course/current/dbi/tomcat/home/
- In the Context declaration mode
radio button choose Server.xml.
- In the Configuration file text
field write the path of server.xml under
your chosen Tomcat-base directory ($CATALINA_BASE/conf/server.xml)
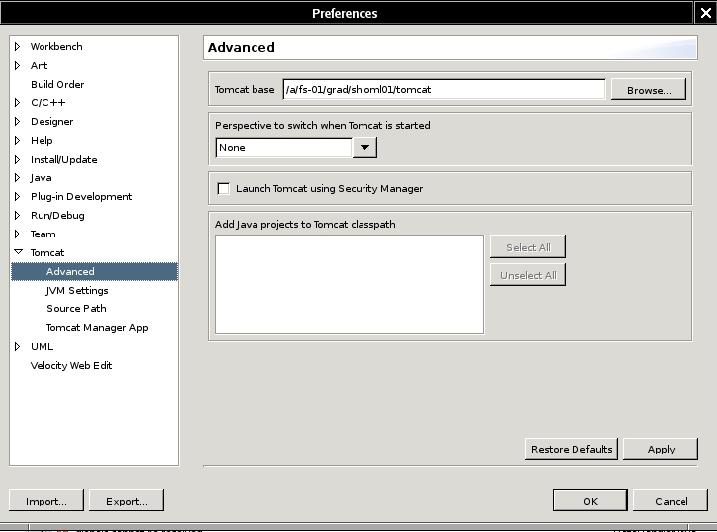
- In the left frame, click on
Advanced in the list expanded under Tomcat.
-
In the right frame, write your chosen
$CATALINA_BASE directory
in the Tomcat base text
field.
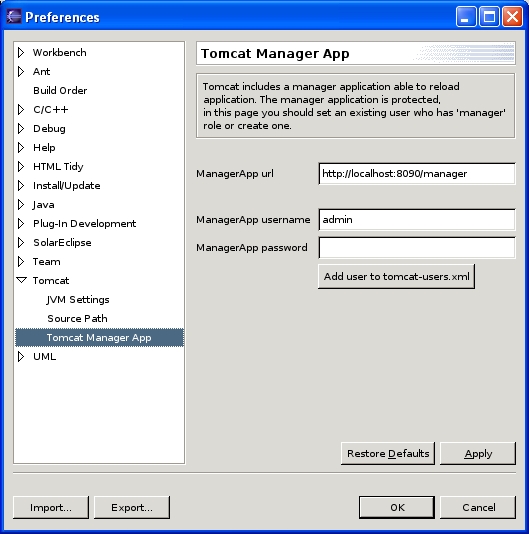
- In the left frame, click on Tomcat Manager
App in the list expanded under Tomcat.
-
In the right frame, do the following:
- In the Manager App url text
field write the URL of Tomcat's manager application. This URL is
http://<compname>:<port>/manager
where compname is the name of the computer on which Tomcat runs and
port is the port Tomcat listens to. For example: http://localhost:8090/manager will be used if you run
Tomcat and Eclipse on the same computer and the port you chose for
Tomcat is 8090;
- In the Manager App username and
password text
fields write the name and password of your server's manager user.
- Press the OK button
at the bottom of the window
Now Eclipse is set to work with Tomcat, you can open a Tomcat
project.
Opening a Tomcat Project
First create your Web Application Directory
under $CATALINA_BASE/webapps/. For detailed
instructions see the section about direct
programming.
To edit your application, open a Tomcat project as follows:
- Choose the File menu item in the main menu. In
this menu item choose New ->
Project....
- In the opened form, choose Java (on the left frame) and Tomcat Project (on the right frame).
- Press the Next button.

- Choose a name for your project and unmark the Use default check box. As a working directory (the
Directory text box) choose the Web
application you created (under $CATALINA_BASE/webapps/).
- Click Next.

- In the new window, clear all the data: unmark the check box Can update server.xml
file and clear the text fields (Context
name and Subdirectory to
set...).
- Click Finish.

- If a message box is opened and asks you whether you would like a Java perspective to be opened, choose Yes.
Editing Your Application
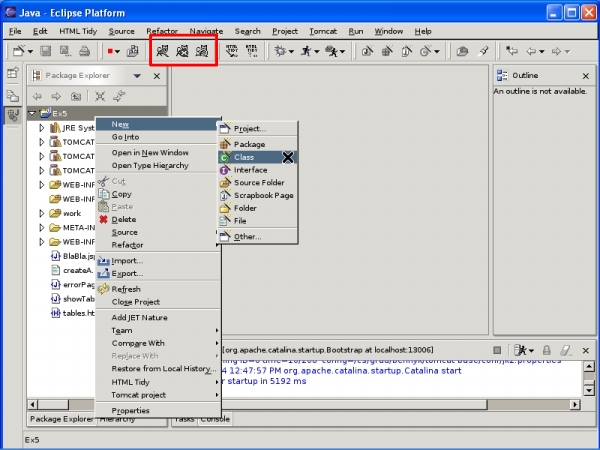
To add Java classes to your project, right click on your project element
on the left frame, choose New ->
Class... and follow the regular class-creation instructions. Make sure that the location of the source file is WEB-INF/src/.
If you use packages (for example, to use classes from JSP files), you will have to define them first. To create a package, right click on your project element
on the left frame, choose New ->
Package... and fill the package name. When you add classes under this package, Eclipse will automatically put the compiled class in the suitable location under WEB-INF/classes/ (e.g. WEB-INF/classes/package-name/class-name.class).
Note that Eclipse does not update the file WEB-INF/web.xml, therefore it is still up to you to update this file.
You can use the buttons with the cat figures to start/stop/reload Tomcat, or alternatively use the shell for this purpose.
To create files that are not Java classes (HTML, JSP, XML, XSL, etc...), right click on your project element
on the left frame, choose New ->
File and fill the file name. You may also add sub directories
(New ->
Folder) and add files under them. This time, you will have right click on the folder element.
Screenshot images were donated by Shlomi Levi (shloml01@cs).
Thank you Shlomi.